


Key Takeaways
- Regular hydrogen peroxide is a dealership-approved method for removing water stains from car headliners without requiring replacement.
- A simple microfibre cloth with an all-purpose cleaner can effectively eliminate most water stains when used properly, emphasising minimal moisture.
- Vinegar solutions offer a budget-friendly alternative that works well on fresh water stains with minimal risk of damage
- Proper drying techniques are critical for preventing headliner sagging, regardless of the cleaning method you choose.
- Ordiniq’s Handheld Wired Car Vacuum supports proper headliner care by extracting the dust and particulates that water loosens and spreads during stain formation.
Water Stains on Your Car Headliner? Understanding the Challenge
Water stains on your car's headliner can be unsightly reminders of leaks or spills. These stubborn marks often appear as yellowish or brownish rings that can make even the most well-maintained vehicle interior look neglected.
Whilst many drivers assume headliner replacement is the only solution, professional auto detailers and car dealerships have been using simple, effective techniques to completely remove these stains for years.
Understanding what you're dealing with represents the first step toward successful stain removal. The fabric covering your car's ceiling (the headliner) is typically a thin foam-backed material, which is particularly susceptible to water damage.
When water contacts this material, it dissolves dirt and other particles, carrying them to the edges of the wet area as it dries. This creates the distinctive ring pattern that's so difficult to remove with regular cleaning products.
The good news is that with the right approach, most water stains can be completely eliminated without professional help.
|
Ordiniq Handheld Car Vacuum: Drive Clean, Drive Fresh Join 10,000+ Drivers Who Keep Their Cars Spotless Why Ordiniq’s Vacuum Is Essential
What Customers Say ★★★★★"I keep this light weight vacuum cleaner in our car and handy to clean the mess created by little one. The size is small but powerful enough to clean the car seat. It also has accessories to allow to clean the small gap and corner. Definitely will buy another piece for another car. Good value too." - Connie Try It Risk-Free for 30 Days Experience spotless car interiors with zero worries. If it doesn't transform your daily commute within 30 days, we'll refund your purchase—no questions asked. FREE BONUSES: 1-Year Extended Warranty + FREE Shipping Get Ordiniq's Handheld Wired Car Vacuum Cleaner Today! *Ordiniq also offers AutoPump and a Tyre Repair Kit —great extras to keep in your boot for added peace of mind. |
Method 1: The Hydrogen Peroxide Technique

Dealership service departments have long relied on hydrogen peroxide's gentle oxidising properties to break down stain compounds without the aggressive wetness.
This method has gained popularity in automotive forums after users discovered it was the same technique used by professional detailers charging premium prices.
The gentle oxidising properties of hydrogen peroxide lift the stain particles from the fabric without the aggressive wetness that can damage the underlying foam backing.
What You'll Need
Before starting the hydrogen peroxide treatment, gather all necessary supplies to ensure efficient application.
- Regular 3% hydrogen peroxide (the standard brown bottle available at pharmacies)
- Clean microfibre cloths (at least 2–3)
- Spray bottle (optional for larger areas)
- Soft bristle brush (for stubborn stains)
- Clean, dry towels for blotting
Step-by-Step Process
- Test the hydrogen peroxide on an inconspicuous area of the headliner first.
- Lightly dampen (not soak) a clean microfibre cloth with hydrogen peroxide.
- Gently dab the stained area, working from the outside toward the centre.
- Apply minimal pressure in a circular motion.
- Allow to air dry for 5–10 minutes.
- Blot with a clean, dry microfibre cloth.
- Repeat if necessary for stubborn stains.
When applying the hydrogen peroxide, the key is controlling the amount of moisture. Headliners contain foam backing that can easily become saturated, potentially leading to sagging or adhesive failure. Your cloth should be damp enough to transfer the peroxide to the stain, but not wet enough to soak through to the backing.
Safety Precautions
Whilst hydrogen peroxide is generally safe for headliner fabrics, there are important safety considerations to keep in mind. Always wear gloves to protect your skin from irritation, especially if you have sensitive skin or cuts on your hands.
Work in a well-ventilated area, avoiding breathing in fumes, and keep hydrogen peroxide away from your eyes.
Be aware that hydrogen peroxide can have a mild bleaching effect on some fabrics. This is why the testing step is important, especially for headliners with darker colours. Never mix hydrogen peroxide with other cleaning chemicals, as this can create potentially dangerous chemical reactions.
Method 2: The Microfibre & All-Purpose Cleaner Technique

Professional detailers favour this method for its gentle yet thorough cleaning, making it suitable for most standard headliner fabrics.
For those who prefer to avoid hydrogen peroxide or have particularly delicate headliner materials, the microfibre and all-purpose cleaner method offers an effective alternative.
Required Materials
- High-quality microfibre cloths (medium to high pile)
- Automotive-specific all-purpose interior cleaner
- Soft bristle brush for stubborn areas
- Clean, dry towels for blotting
- Small bowl for solution (if diluting)
Your all-purpose cleaner should be specifically formulated for car interiors—kitchen or bathroom cleaners often contain harsh chemicals that can damage headliner adhesives or cause discolouration.
Step-by-Step Process
- Begin by wrapping a clean microfibre cloth around your fist or hand to create a flat cleaning surface with even pressure distribution.
- Apply a small amount of all-purpose cleaner directly to the cloth (never spray directly on the headliner). Then, using gentle circular motions, work from the outside of the stain toward the centre, applying even pressure throughout.
- Allow the area to dry completely before assessing whether another application is needed. For stubborn stains, you may need to repeat the process 2–3 times, but always allow complete drying between attempts. Finish by buffing the area with a clean, dry microfibre cloth to restore the headliner's original texture.
The key to success is using minimal moisture and allowing adequate drying time between applications.
Selecting Appropriate Cleaners
The ideal product will have enough cleaning power to break down stains without excessive moisture or harsh chemicals that could damage the headliner's backing adhesive.
Look for products labelled as "interior cleaners" or "upholstery cleaners" rather than general-purpose or multi-surface cleaners. Many professional detailers recommend water-based cleaners with neutral pH levels between 6 and 8.
Avoid products containing strong solvents, bleach, or ammonia, as these can weaken the headliner adhesive and cause it to sag over time. If your vehicle has a premium or suede-like headliner, check your owner's manual for specific cleaning recommendations.
Method 3: Vinegar Solution—The Budget-Friendly Option

White vinegar's mild acidic properties break down mineral deposits and water-soluble stains without harsh chemical effects.
When professional cleaners aren't readily available, a simple vinegar solution can be surprisingly effective in tackling water stains on car headliners.
This household remedy uses the mild acidic properties of white vinegar to break down mineral deposits and water-soluble stains without the harsh effects of commercial chemicals.
Creating the Perfect Vinegar Mixture
Perfect Vinegar Solution Recipe
- 60ml (1/4 cup) white distilled vinegar
- 240ml (1 cup) warm water
- 3–4 drops mild dish soap (optional)
- Mix in a clean spray bottle or small bowl
Mix 1 part white distilled vinegar with 4 parts warm (not hot) water in a small bowl or a spray bottle. For enhanced cleaning power, you can add a few drops of dish soap, which helps break down oils that might be present in the stain.
Avoid using apple cider vinegar or other coloured vinegars, as they may leave stains.
Step-by-Step Process
The application method for vinegar solution requires a light touch to prevent over-saturating the headliner. Dampen a clean microfibre cloth with the solution—the cloth should be just moist enough to transfer the cleaning mixture to the stain without soaking the headliner.
Working from the outer edges toward the centre, gently dab and blot the stained area rather than rubbing vigorously, which could damage the delicate fabric or spread the stain further.
For larger or more stubborn stains, you may need to apply the solution several times, but patience is key. Allow each application to dry completely before assessing whether another treatment is necessary.
Eliminating Vinegar Odour Afterward
Whilst vinegar is effective for stain removal, its distinctive smell can linger in your vehicle's interior. To neutralise this odour, prepare a solution of 1 tablespoon of baking soda dissolved in 2 cups of warm water.
Lightly dampen a clean cloth with this mixture and gently blot the previously treated area. The alkaline nature of baking soda effectively counteracts vinegar's acidity whilst neutralising its scent.
Alternatively, once the headliner is completely dry, you can use a fabric refresher spray specifically designed for automotive interiors. Be sure to spray the product onto a cloth first rather than directly onto the headliner to minimise moisture exposure.
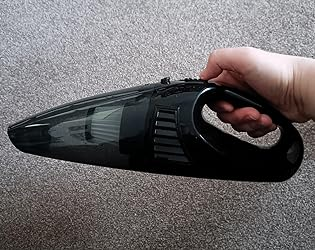
How the Ordiniq Handheld Wired Car Vacuum Supports Headliner Care

The Ordiniq Handheld Wired Car Vacuum removes the dust and particulates that water dissolves into visible staining—prevention that reduces cleanup severity.
Ironically, water stains aren't caused solely by water. Moisture dissolves dust and airborne particles accumulated on your headliner, then deposits this contamination at drying edges—creating those stubborn brown rings. The cleaner your interior surfaces, the less severe any staining will be when leaks or spills occur.
At Ordiniq, our Handheld Wired Car Vacuum enables regular maintenance to keep particulate levels low. The powerful motor provides suction strong enough for thorough debris removal yet gentle enough for delicate headliner materials—hold it slightly away from the surface, letting airflow draw particles without stressing the foam backing.
The wired connection delivers unlimited runtime for systematic cleaning across every surface where dust settles: dashboards, door panels, crevices, and the overhead areas most people neglect. Its filter captures fine particles rather than blowing them back into circulation.
Round out your vehicle care with our best-selling AutoPump for accurate tyre inflation and the Tyre Repair Kit for unexpected punctures.
| Purchase your Handheld Wired Car Vacuum today! |
Frequently Asked Questions (FAQs)
Can I use bleach to clean my car's headliner?
No, you should never use bleach on your car's headliner. Bleach is far too harsh for the delicate fabric and foam backing of automotive headliners. It can permanently discolour the material, weaken the adhesive that holds the headliner to the roof, and potentially cause the fabric to separate from its backing.
Even diluted bleach solutions pose significant risks to headliner integrity. The harsh chemicals in bleach may temporarily appear to address staining, but create far worse damage than the original watermarks.
How long does it take for a headliner to dry after cleaning?
Drying time varies based on the cleaning method used, ambient temperature, and humidity levels, but you should generally allow 2–4 hours for complete drying. Using fans or driving with windows slightly open can accelerate the process by increasing air circulation.
Avoid using heat sources, such as hair dryers, which can damage the adhesive and cause separation or bubbling in the headliner material. The headliner should feel completely dry to the touch before considering the drying process complete.
Will cleaning my headliner cause it to sag?
Cleaning your headliner will not cause sagging if you use proper techniques minimising moisture exposure. Sagging occurs when excessive liquid penetrates through to the foam backing, weakening the adhesive bond between the fabric and the vehicle's roof panel.
The methods outlined in this article specifically limit moisture application in order to prevent this issue.
Can I prevent water stains from setting in my car’s headliner if I act quickly?
Yes, immediate action significantly improves your chances of preventing permanent water stains. If your headliner gets wet, blot (don't rub) the area immediately with absorbent microfibre towels or paper towels, removing as much moisture as possible. Continue blotting until no more moisture transfers to your towel.
Then use a fan to circulate air in the vehicle with the windows open, which helps evaporate any remaining moisture before minerals in the water have time to form visible stain rings.
Why does Ordiniq's Handheld Wired Car Vacuum’s unlimited runtime matter for interior maintenance?
Dust settles everywhere—dashboards, crevices, door panels, headliners. Thorough cleaning that addresses all surfaces takes longer than quick tidying. Ordiniq's Handheld Car Vacuum features a wired connection, letting you work systematically without battery constraints that cut sessions short.
*Note: Pricing and/or product availability mentioned in this post are subject to change. Please check our website for current pricing and stock information before making a purchase.


