


Key Takeaways
- Quick action prevents vomit acids from etching plastic surfaces and permanently staining fabric door panel inserts.
- Door panels combine multiple materials (plastic trim, fabric or leather inserts, and metal hardware), each requiring a specific cleaning approach.
- Window mechanisms, speaker grilles, and handle recesses create hidden areas where vomit can accumulate unnoticed, causing lingering odours.
- Enzymatic cleaners prove essential for biological contamination, breaking down odour-causing proteins that standard cleaners merely mask.
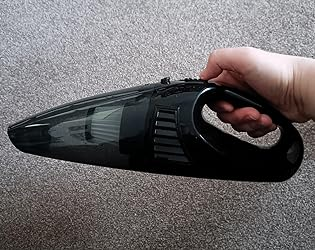
- Ordiniq’s Handheld Wired Car Vacuum uses powerful suction and unlimited runtime to reach concealed areas within door panels where debris can migrate during initial incidents.
Vomit on Your Car Door Panel? Understanding the Unique Challenges
You've just cleaned up the vomit from your car seat, only to discover it's run down into your door panel—into the speaker grille, behind the handle, and into crevices you can't even see. Sound familiar?
The vertical orientation means biological matter doesn't simply pool on surfaces. It flows downward, seeping into speaker grilles, accumulating in handle recesses, and migrating behind trim pieces where it remains hidden whilst continuing to produce odours.
Understanding this flow pattern proves essential for complete cleanup rather than surface-only treatment that leaves contamination festering in concealed spaces.
Door panels also combine multiple materials, requiring different cleaning approaches within the same component. Most modern vehicles feature plastic upper and lower trim sections, fabric or leather insert panels, metal door handles, and electronic components, including window switches and speaker assemblies.
Each material responds differently to cleaning solutions, and approaches safe for plastic trim might damage fabric inserts or corrode electronic connections.
The acidic nature of vomit compounds these challenges. Stomach acids can etch plastic surfaces if left in contact, creating permanent dulling or discolouration.
|
Ordiniq Handheld Car Vacuum: Drive Clean, Drive Fresh Join 10,000+ Drivers Who Keep Their Cars Spotless Why Ordiniq’s Vacuum Is Essential
What Customers Say ★★★★★"I keep this light weight vacuum cleaner in our car and handy to clean the mess created by little one. The size is small but powerful enough to clean the car seat. It also has accessories to allow to clean the small gap and corner. Definitely will buy another piece for another car. Good value too." - Connie Try It Risk-Free for 30 Days Experience spotless car interiors with zero worries. If it doesn't transform your daily commute within 30 days, we'll refund your purchase—no questions asked. FREE BONUSES: 1-Year Extended Warranty + FREE Shipping Get Ordiniq's Handheld Wired Car Vacuum Cleaner Today! *Ordiniq also offers AutoPump and a Tyre Repair Kit —great extras to keep in your boot for added peace of mind. |
Essential Supplies for Door Panel Cleaning
Gathering appropriate supplies before starting prevents interruptions during time-sensitive cleanup and ensures you have everything needed for each material type in your door panel.

Having supplies ready stops mid-clean pauses and supports proper cleaning of each door panel material.
Core Supplies
- Disposable gloves (essential for biological contamination)
- Paper towels or disposable cloths for initial removal
- Plastic scraper or old credit card
- Clean microfibre cloths (at least 4–5 pieces)
- Enzymatic cleaner formulated for biological stains
- All-purpose interior cleaner for plastic surfaces
- Spray bottle with clean water
- Cotton swabs for detailed crevice cleaning
- Soft-bristled brush (an old toothbrush works well)
- Vacuum with crevice attachment
Material-Specific Additions
- For leather inserts: pH-balanced leather cleaner and conditioner
- For fabric inserts: Upholstery cleaner or carpet shampoo
- For speaker grilles: Compressed air canister
- For electronic components: Electrical contact cleaner (if contamination reaches switches)
Critical Note: Never use bleach, ammonia, or harsh solvents on door panel materials. These can damage plastic finishes, discolour fabrics, and corrode electronic connections. Enzymatic cleaners specifically formulated for biological contamination provide effective cleaning without these risks.
Method 1: Immediate Response
Step 1: Protect Yourself and Assess the Situation
Put on disposable gloves before touching any contaminated surfaces. Assess where vomit has spread; check not just visible surfaces but also the door handle recess, speaker grille, window switch area, and the gap between door panel and door frame. Understanding the extent of the problem guides your cleaning approach.
If vomit has reached electronic components (window switches, mirror controls), avoid introducing any liquid until you've addressed these areas specifically. Water or cleaning solutions on active electrical connections can cause short circuits or corrosion.
Step 2: Remove Solid Matter
Using paper towels or disposable cloths, carefully remove solid matter, working from the outside edges inward. For vomit on vertical surfaces, work from the top down to prevent further downward flow. Use a plastic scraper for any material that's beginning to dry or adhere to surfaces.
Dispose of contaminated materials immediately in a sealed plastic bag. This contains odours and prevents accidental spread to other vehicle areas during subsequent cleaning steps.
Step 3: Blot Remaining Moisture
After removing solids, blot (never rub) remaining moisture from all affected surfaces. Rubbing spreads contamination and can force liquid deeper into fabric inserts or push it further into crevices.
Use firm pressing motions with clean sections of your cloth, continuing until minimal moisture transfers.
For fabric door panel inserts, this blotting phase proves particularly important. Fabric absorbs liquid rapidly, and thorough blotting now reduces the depth of contamination penetration—making subsequent cleaning more effective.
Step 4: Address Concealed Spaces Immediately
Before moving to detailed cleaning, address the concealed spaces where vomit may have migrated. Check and clean:
- Speaker grilles: Vomit flows through perforations into speaker cavities.
- Handle recesses: The curved interior of door handles traps liquid.
- Window switch surrounds: Gaps around the switches allow liquid to enter.
- Trim panel gaps: Spaces between trim pieces and the door frame.
Use cotton swabs dampened with water for initial cleaning of these areas. A car vacuum with a crevice attachment can extract liquid from speaker grilles and trim gaps more effectively than swabbing alone.
Method 2: Deep Cleaning by Material Type

Door panels combine multiple materials—effective cleaning requires treating each surface type appropriately rather than applying a single approach across all areas.
Cleaning Plastic Trim Surfaces
Plastic door panel trim represents the most straightforward cleaning task, but requires attention to prevent surface damage. Vomit's acidity can etch plastic if residue remains, creating permanent dulling.
Cleaning Process
- Spray all-purpose interior cleaner onto a microfibre cloth (not directly on the surface).
- Wipe plastic surfaces using gentle pressure and overlapping strokes.
- Pay particular attention to textured areas where residue can hide in surface patterns.
- Rinse by wiping with a clean, water-dampened cloth.
- Dry immediately with a fresh microfibre cloth to prevent water spots.
- For any remaining odour, apply the enzymatic cleaner following the same cloth-application method.
For textured plastic with deep grain patterns, use a soft-bristle brush to work the cleaner into the surface texture, then wipe clean. This dislodges contamination trapped in surface irregularities.
Cleaning Fabric Door Panel Inserts
Fabric inserts absorb contamination more deeply than plastic surfaces, requiring more intensive treatment. The goal is to remove both visible staining and the biological matter causing odours.
Cleaning Process
- Apply enzymatic cleaner to the affected area—these products break down proteins that cause odours.
- Allow the specified dwell time on the product (typically 5–10 minutes for enzymatic cleaners).
- Gently agitate with a soft brush if the fabric texture permits.
- Blot with a clean, damp microfibre cloth to remove cleaner and dissolved contamination.
- Repeat application if staining or odour persists.
- Final blot with a dry cloth to extract maximum moisture.
Important: Don't oversaturate fabric inserts. Excessive moisture can soak through to the foam backing beneath, creating conditions for mould growth. Your cleaning cloth should be damp enough transferring solution to the fabric but not wet enough to saturate through to the backing materials.
Cleaning Leather Door Panel Inserts
Leather requires a gentler approach than fabric, with particular attention to maintaining its condition after cleaning.
Cleaning Process
- Wipe with a microfibre cloth dampened with pH-balanced leather cleaner.
- Work in small sections using gentle circular motions.
- Immediately follow with a dry cloth to remove excess moisture.
- For any remaining odour, apply an enzymatic cleaner formulated as safe for leather.
- After complete drying, apply leather conditioner to restore moisture and protection.
Never allow leather to remain wet; moisture left on leather surfaces can cause water spotting or, over time, promote mould growth within the leather's surface.
Addressing Electronic Components
Door panels contain electronic components (window switches, mirror controls, speaker connections) that require specific consideration during cleaning.
Safety Approach
- Disconnect the vehicle battery if contamination has directly contacted the electrical connections.
- Use minimal moisture around switch panels—apply cleaner to cotton swabs rather than spraying.
- For speaker grilles that have vomit inside, consider removing the grille for separate cleaning if possible.
- Allow complete drying (24+ hours) before reconnecting the battery or using the affected controls.
Method 3: Odour Elimination for Persistent Smells

Lingering odours indicate biological contamination remains somewhere within the door panel structure.
Understanding Why Odours Persist
Vomit odour comes from proteins breaking down over time, releasing volatile compounds that our noses detect at extremely low concentrations. Standard cleaners may remove visible contamination but leave protein residue that continues producing odour.
Additionally, contamination in concealed spaces (inside speaker housings, behind trim pieces, within fabric backing) continues generating a smell even when visible surfaces are clean.
Enzymatic Treatment for Odour Sources
Enzymatic cleaners contain bacteria producing enzymes that break down organic proteins at the molecular level, actually eliminating odour sources rather than masking them.
For persistent door panel odours:
- Identify probable contamination locations: Consider where vomit could have flowed during the initial incident.
- Apply enzymatic cleaner to all suspect areas: Including crevices, speaker grilles, and fabric inserts.
- Allow extended dwell time: Enzymatic products often need a few minutes to work effectively.
- Don't rush drying: The bacteria in enzymatic cleaners continue working whilst the area remains moist.
- Repeat if necessary: Severe contamination may require multiple treatments over several days.
Baking Soda Absorption Treatment
After enzymatic treatment, baking soda can absorb residual odour compounds. For fabric inserts, sprinkle baking soda over the affected area, allow to sit for several hours (overnight if possible), then vacuum thoroughly.
For plastic surfaces and crevices, create a paste with baking soda and a small amount of water, apply to affected areas, allow to dry completely, then wipe away and vacuum residue.
Ventilation & Air Circulation
Proper ventilation accelerates odour dissipation. After cleaning, leave the windows partially open (weather permitting) for several hours to allow air to circulate.
Avoid closing the vehicle immediately after cleaning, as trapped moisture and cleaning product residues can create musty secondary odours.
Why the Ordiniq Handheld Wired Car Vacuum Excels at Door Panel Cleanup

The Ordiniq Handheld Wired Car Vacuum reaches speaker grilles, handle recesses, and trim gaps where vomit migrates invisibly.
Door panels aren't flat surfaces. They're architectural structures full of hidden spaces: speaker grilles with perforations, curved handle recesses, gaps between trim pieces. When vomit flows downward across these surfaces, it doesn't just sit where you can see it; it migrates into cavities where cotton swabs and cloths can't follow.
Our Handheld Wired Car Vacuum extracts contamination from these concealed spaces. The crevice attachment enters trim gaps and handle recesses, pulling biological matter and debris from depths no cloth can reach. Position it over the speaker grilles to draw moisture back through the perforations where liquid flowed in.
The wired connection provides unlimited runtime for systematic work around the entire door panel architecture—every crevice, every trim gap, every potential accumulation point. The powerful motor (39,000 R/min) maintains consistent suction throughout. The filtration captures extracted biological matter rather than redistributing it into your vehicle's air.
Build a complete vehicle care kit with our best-selling AutoPump for precise tyre inflation and the Tyre Repair Kit for roadside punctures.
| Purchase your Handheld Wired Car Vacuum today! |
Frequently Asked Questions (FAQs)
Can vomit permanently damage car door panel materials?
Yes, vomit can cause permanent damage if left untreated. The acidic nature of stomach contents can etch plastic surfaces, causing permanent dulling or changes in surface texture that no amount of cleaning can reverse.
Fabric inserts can suffer permanent staining if biological matter binds to the fibres before proper cleaning.
How do I clean vomit from speaker grilles without damaging the speakers?
Speaker grilles present particular challenges because the perforations that allow sound to pass also allow liquid to enter the speaker cavity behind them.
For surface contamination on the grille itself, use an enzymatic cleaner applied to a cloth and wipe gently across the grille surface. For contamination that has flowed through the grille into the speaker cavity, a more careful approach is needed.
Should I remove the door panel for thorough cleaning?
Door panel removal enables access to contamination that's migrated behind trim pieces or into spaces inaccessible from the front. However, this approach involves risks. Modern door panels contain electronic connections (window switches, speakers, courtesy lights) that must be carefully disconnected.
Plastic clips securing panels can break during removal, requiring replacement. Incorrectly reinstalled panels can create rattles, gaps, or electronic malfunctions.
How does Ordiniq's Handheld Wired Car Vacuum specifically help with door panel vomit cleanup?
Ordiniq’s Handheld Wired Car Vacuum solves the challenge of door panel architecture, which contains many hidden spaces where debris can accumulate, but manual cleaning cannot reach.
Its wired, unlimited runtime allows you to work methodically around the entire door panel, thoroughly addressing every crevice, rather than rushing through shortened sessions limited by battery power.
*Note: Pricing and/or product availability mentioned in this post are subject to change. Please check our website for current pricing and stock information before making a purchase.


