


Key Takeaways
- Always let mud dry completely before attempting to remove it from car seats—this prevents the stain from spreading deeper into the fabric fibres.
- Different seat materials (fabric, leather, vinyl) require specific cleaning approaches to avoid damage whilst effectively removing mud contamination.
- The dry removal technique should always precede wet cleaning methods, removing as much particulate matter as possible before introducing moisture.
- Using the right tools, such as soft-bristle brushes and microfibre cloths, is essential to prevent scratching or damaging your car's upholstery.
- Ordiniq's Handheld Wired Car Vacuum transforms the critical extraction phase from a rushed compromise into a thorough, well-executed process.
Mud Stains on Car Seats? Understanding the Challenge First
Finding mud on your car seats can quickly transform a good day into a frustrating cleaning project. Whether from hiking, children's sports, or simply rainy conditions, mud stains require proper attention to prevent permanent damage.
The key to success lies not in how quickly you act, but in how strategically you approach the cleaning process.
Different car seat materials demand different cleaning approaches. Fabric seats are generally most forgiving, but can absorb stains deeply if not handled properly. Leather seats require special care to prevent cracking or discolouration, whilst vinyl and synthetic materials need gentle but effective cleaning solutions.
Before applying any cleaning method, always identify your seat material and check your car's manual for manufacturer-specific care instructions.
|
Ordiniq Handheld Car Vacuum: Drive Clean, Drive Fresh Join 10,000+ Drivers Who Keep Their Cars Spotless Why Ordiniq’s Vacuum Is Essential
What Customers Say ★★★★★"I keep this light weight vacuum cleaner in our car and handy to clean the mess created by little one. The size is small but powerful enough to clean the car seat. It also has accessories to allow to clean the small gap and corner. Definitely will buy another piece for another car. Good value too." - Connie Try It Risk-Free for 30 Days Experience spotless car interiors with zero worries. If it doesn't transform your daily commute within 30 days, we'll refund your purchase—no questions asked. FREE BONUSES: 1-Year Extended Warranty + FREE Shipping Get Ordiniq's Handheld Wired Car Vacuum Cleaner Today! *Ordiniq also offers AutoPump and a Tyre Repair Kit —great extras to keep in your boot for added peace of mind. |
Method 1: The Dry Removal Technique

Dry removal serves as your first line of defence—extracting maximum particulate matter before introducing any moisture that might spread contamination further into fibres.
This technique focuses on removing as much dried mud as possible before introducing any moisture or cleaning products. For fresh mud incidents, this should always be your starting point, minimising the risk of spreading the stain or pushing it deeper into the upholstery.
Tools You'll Need for Dry Cleaning
- Vacuum cleaner with upholstery attachment and strong, sustained suction
- Soft-bristled brush or old toothbrush
- Plastic scraper or credit card (for hardened mud)
- Microfibre cloths
- Leather brush (if cleaning leather seats)
Step 1: Let the Mud Dry Completely
Patience proves crucial when dealing with mud stains. Allow the mud to dry thoroughly until it becomes completely crusty and brittle; this typically takes 2–4 hours, depending on mud thickness and your climate.
Resist the urge to speed up this process with heat sources like hair dryers, as excessive heat can set some stains permanently or damage your upholstery.
If you're pressed for time, park your car in direct sunlight with the windows cracked to accelerate natural drying, or use your car's heating system at a moderate temperature.
Step 2: Vacuum Thoroughly with Proper Technique
Once the mud is completely dry, use your vacuum cleaner with the upholstery attachment to remove as many of the dried particles as possible. Work in a methodical pattern, starting from the outside of the stain and moving toward the centre, preventing spreading.
Hold the vacuum nozzle slightly above the surface for loose particles, then press it gently against the upholstery for deeper cleaning.
Step 3: Brush Away Remaining Particles
After vacuuming, you'll likely notice some stubborn mud particles still clinging to upholstery fibres. This is where your soft-bristled brush becomes invaluable.
Using gentle, short strokes, brush the affected area to loosen any remaining dried mud. Work in one direction rather than back and forth to prevent pushing particles deeper into the fabric.
Method 2: The Soap & Water Solution

When dry removal doesn't completely eliminate mud stains, gentle soap solutions penetrate deeper than mechanical cleaning alone, breaking down components that have seeped into fabric fibres.
This method works exceptionally well for fabric seats and can be adapted for most seat materials with appropriate precautions.
Supplies for This Method
- Mild dish soap or upholstery shampoo
- Distilled water (preferable to tap water)
- Spray bottle
- Multiple clean microfibre cloths
- Small bucket
- Soft-bristled brush
- Clean towels for drying
For best results, use distilled water rather than tap water, especially if you live in areas with hard water that might leave mineral deposits. Your microfibre cloths should be clean and lint-free, preventing the transfer of additional dirt to seats during cleaning.
Step 1: Test in a Hidden Area First
Before applying any cleaning solution to the visible stain, perform a spot test on an inconspicuous part of the seat, such as underneath or on the side facing the door.
Apply a small amount of your cleaning solution and gently blot with a microfibre cloth, then check for any adverse reactions, such as discolouration, fabric distortion, or colour transfer. Wait approximately 5 minutes, ensuring no delayed reaction occurs.
This crucial testing step can save you from potentially ruining your entire seat with a cleaning solution incompatible with your specific upholstery material.
Step 2: Create the Perfect Cleaning Solution
Mix 1 teaspoon of mild dish soap or upholstery shampoo with 2 cups of warm (not hot) water in your spray bottle or a small bucket. The solution should be diluted enough to clean effectively without leaving soap residue behind.
Excessive soap not only attracts more dirt over time but can also prove difficult to rinse out completely, potentially leading to discolouration or stiffening of the upholstery.
For fabric seats with set-in stains, you might need a slightly stronger solution. In these cases, add 1/2 teaspoon of white vinegar to the mixture, which helps break down stubborn mud without damaging the fabric. The vinegar smell dissipates as the seats dry, leaving no lingering odour.
Important: Never use bleach, ammonia, or alcohol-based cleaners on car upholstery. These harsh chemicals can damage fabric, remove colour, and weaken material over time.
Step 3: Apply & Blot (Never Rub!)
Transfer a small amount of the cleaning solution to a clean microfibre cloth until it's damp but not dripping wet. Starting from the outer edge of the stain and working toward the centre, gently blot the mud-stained area. This directional technique prevents the stain from spreading further.
Never rub or scrub vigorously, as this can damage fabric fibres or leather finishes, potentially making the stain worse or creating worn spots in your upholstery.
Step 4: Rinse & Dry Properly
After successfully removing the mud stain, it's crucial to rinse out all soap residue to prevent future dirt attraction. Dampen a fresh microfibre cloth with clean water and blot the treated area thoroughly. Repeat this rinsing process several times, changing to a clean section of cloth each time, until no soap residue remains.
Once rinsed, press dry towels firmly against the damp area to absorb as much moisture as possible. Allow seats to air dry completely with car doors open if the weather permits, or use a fan directed at the seats to speed up drying.
Method 3: Using Specialised Upholstery Cleaners

Professional-grade upholstery cleaners contain enzymes and surfactants penetrating deeper than soap and water.
When dealing with particularly stubborn or set-in mud stains, specialised upholstery cleaners offer formulations specifically designed for automotive interiors. These products contain enzymes and surfactants that penetrate deeper than soap and water, dissolving the organic components in mud without damaging the upholstery's colour or texture.
Best Products for Different Seat Materials
- Fabric seats: Foam-based upholstery cleaners that lift dirt without excessive moisture.
- Leather seats: pH-balanced leather cleaners followed by leather conditioner.
- Vinyl/synthetic materials: All-purpose interior cleaners designed for synthetic surfaces.
- Suede/alcantara: Specialised suede cleaners with soft-bristled application brushes.
- Persistent stains on any material: Enzyme-based stain removers specifically for automotive use.
Select products that match your specific seat material, ensuring effective cleaning without damaging the seat. Always check product labels for compatibility, and when uncertain, consult your vehicle's manual for manufacturer recommendations.
Application Technique for Maximum Effectiveness
Most specialised upholstery cleaners come with specific application instructions that should be followed carefully. Generally, apply the product to a clean microfibre cloth rather than directly to the seat, then work in small sections, ensuring thorough cleaning without oversaturating.
For foam-based products, apply a small amount to the affected area, allow it to penetrate according to package directions (typically 3–5 minutes), then blot away with a clean cloth. Some products may require agitation with a soft brush to work the cleaner into the fibres, whilst others rely more on dwell time to break down stains.
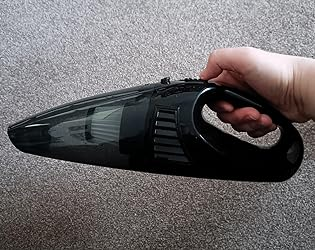
Why the Ordiniq Handheld Wired Car Vacuum Excels at Mud Removal

The Ordiniq Handheld Wired Car Vacuum connects to your 12V outlet for unlimited runtime—delivering the sustained extraction that mud removal actually requires.
Every mud removal method ends the same way: vacuuming. Whether you've brushed away dried particles, applied soap solutions, or used specialised cleaners, the final step determines whether your seats actually get clean. That's where most cleaning attempts fall short—not in technique, but in extraction.
Ordiniq's Handheld Wired Car Vacuum delivers full power for as long as the job requires. Complete the multiple passes that thorough extraction demands; work every seam and crevice where mud migrates, and return to stubborn areas after additional brushing without watching a battery indicator dictate when you stop.
The powerful motor maintains consistent suction from first pass to last—no gradual weakening, no throttled performance. The upholstery tool handles broad surfaces while the crevice attachment reaches seams and seat edges where particles accumulate. Its filtration captures fine, dry mud dust, preventing it from recirculating throughout your interior.
We also offer the AutoPump for tyre inflation and a comprehensive Tyre Repair Kit as a complete vehicle care for owners who value results.
| Purchase your Handheld Wired Car Vacuum today! |
Frequently Asked Questions (FAQs)
Can I use vinegar to remove mud stains from car seats?
White vinegar can prove effective on mud stains when used properly. Mix 1 part white vinegar with 2 parts warm water, then add a drop of dish soap for enhanced cleaning power.
This solution works well on fabric seats but should be used cautiously on leather. The mild acidity helps break down the organic components in mud and soil without damaging most upholstery types.
How do I remove mud from leather car seats without damaging them?
Leather requires special care when removing mud stains. First, allow the mud to dry completely, then gently brush away loose particles with a soft leather brush. For remaining stains, use pH-balanced leather cleaner applied to microfibre cloth—never apply liquids directly to leather or use excess moisture.
Work in small sections with gentle circular motions, then wipe away cleaner with a fresh, damp cloth. Once clean, apply a quality leather conditioner to prevent the leather from drying out or cracking.
Will baking soda help remove mud stains from car upholstery?
Baking soda can be highly effective at removing mud stains, particularly those that have left discolouration on fabric seats. Create a paste by mixing baking soda with just enough water to form a spreadable consistency.
Apply this paste to the stained area, gently work it into the fabric with a soft brush, then allow it to dry completely—usually 2–4 hours. Once dry, vacuum thoroughly, removing all residue.
How does Ordiniq's Handheld Wired Car Vacuum specifically help with mud stain removal?
The Handheld Wired Car Vacuum addresses the fundamental challenge that determines the success of mud removal: extraction thoroughness. Every cleaning method—whether dry brushing, soap solutions, or specialised cleaners—depends on subsequent vacuuming to actually remove the loosened contamination.
The Ordiniq vacuum delivers unlimited runtime, allowing thorough multi-pass cleaning without the limitations of battery-powered models.
*Note: Pricing and/or product availability mentioned in this post are subject to change. Please check our website for current pricing and stock information before making a purchase.


